DaVinci Resolve is one of the few professional editing programs you can download and use for free, with no watermark and no time limit. It edits, color grades, mixes sound, and builds visual effects in one application, so a beginner can take a film from raw footage to a finished file without buying anything. This guide explains what Resolve is, what the free version leaves out, and how to cut, grade, mix, and export your first project.
What DaVinci Resolve is, and where it came from
Resolve started life as a high-end color correction system from da Vinci Systems, a company whose machines were used to grade film and television. Blackmagic Design, an Australian maker of video hardware, bought da Vinci in 2009 and turned Resolve into software anyone could install. A free edition, then called DaVinci Resolve Lite, arrived with version 8 in 2011.
Over the next releases Resolve grew from a grading tool into a full post-production suite. Basic editing arrived in version 10 (2013), and version 11 (2014) made it a complete editor. Version 14 (2017) added Fairlight, a professional audio workspace, and version 15 (2018) built in Fusion, a node-based visual effects and motion graphics tool. The current release is DaVinci Resolve 21, which adds a Photo page for still images; version 21.1 came out in September 2026. It runs on Windows, macOS, and Linux, and a reduced version runs on iPad.
Free vs. Studio: what you get without paying
Blackmagic sells a paid edition, DaVinci Resolve Studio, with a list price of $295 as a one-time purchase (Blackmagic runs occasional sales). For most first films, the free version is enough. Here is how the two compare, based on Blackmagic’s own product page:
| DaVinci Resolve (free) | DaVinci Resolve Studio ($295) | |
|---|---|---|
| Resolution and frame rate | Up to Ultra HD (3840 × 2160), up to 60 frames per second | Beyond 4K, up to 120 frames per second |
| Formats | Blackmagic says it works with “virtually all 8-bit video formats” | Adds wider 10-bit format support |
| Editing, color, Fairlight audio, Fusion effects | Included | Included |
| Multi-user collaboration and HDR grading | Included | Included |
| AI tools (Neural Engine), Magic Mask, noise reduction, text-based editing, film grain | Not included | Included |
The biggest thing beginners miss in the free version is noise reduction, which cleans up grainy low-light footage. If you shoot in good light, you may never need it.
Before you install: your computer
Resolve leans heavily on your computer’s graphics card (GPU), much more than most video software. Blackmagic’s release notes have long recommended 16 GB of memory, and 32 GB if you work in Fusion, along with a reasonably recent graphics card. Check the current requirements on Blackmagic’s support page before you install, because they change between versions. If your computer is older, Resolve still works: you just edit with lighter proxy files (more on that below).
Installing Resolve and starting a project
- Download it from Blackmagic Design’s website (blackmagicdesign.com, under Products, DaVinci Resolve). Choose the free “DaVinci Resolve” download, not “Studio,” and pick your operating system.
- Install and open it. The first screen is the Project Manager. Click New Project and give it a name.
- Set the project’s frame rate first. Open File › Project Settings and set the timeline resolution (1920 × 1080 is a safe start) and the timeline frame rate to match your footage, usually 24, 25, or 30 frames per second. Do this before you build a timeline, because Resolve locks the timeline frame rate once timelines exist.
- Bring in your footage. Drag your clips from your computer into the media pool. If Resolve asks whether to change the project frame rate to match the clips, say yes if they were all shot at the same rate.
The pages: a tour
Resolve is organized into pages, chosen with the buttons along the bottom of the window. Each page is a workspace for one stage of post-production:
- Media: import, organize, and sync your footage and sound.
- Cut: a fast, simplified editing page, good for rough cuts and short projects.
- Edit: the full editing page, with a traditional multi-track timeline.
- Fusion: visual effects, titles, and motion graphics, built from connected nodes.
- Color: color correction and grading, the tools Resolve is famous for.
- Fairlight: audio editing and mixing.
- Deliver: export (or “render”) the finished film.
Version 21 adds a Photo page for still images. You don’t have to use every page: many short films are made entirely on the Edit, Color, Fairlight, and Deliver pages.
Your first edit
Open the Edit page. Double-click a clip in the media pool to load it in the source viewer on the left. The timeline at the bottom is where your film takes shape.
- Play and scrub: the J, K, and L keys play backward, pause, and play forward. Tap L twice to play at double speed.
- Mark the part you want: press I where the useful part of the clip starts and O where it ends.
- Put it in the timeline: F9 inserts the marked section at the playhead and pushes everything after it along; F10 overwrites whatever is there.
- Cut a clip in two: move the playhead to the spot and press Ctrl+B (Cmd+B on a Mac).
- Remove a piece without leaving a gap: select it and press Shift+Delete (a “ripple delete”).
- Trim: press T for trim mode, then drag the edge of a clip to shorten or lengthen it; the clips after it move to keep the timeline closed up. Press A to go back to the normal selection tool.
Three habits make cuts feel professional. Cut on action: change shots in the middle of a movement, like a door opening or a head turning, and the eye follows it across the cut. Use split edits: let the next scene’s sound start a moment before its picture (a “J cut”), or let a line of dialogue carry over the next shot (an “L cut”). And cut for the story, not the footage: if a shot doesn’t move the scene forward, it goes, however hard it was to get. Our guide to camera shots and angles explains why a scene needs coverage to edit like this.
Color: correct first, then grade
On the Color page, each clip is adjusted with a chain of nodes, like layers in a photo editor. Work in two stages.
Correction makes each shot look natural and makes shots in a scene match. Open the scopes (Workspace › Video Scopes): the waveform shows brightness from dark at the bottom to bright at the top, and the parade shows red, green, and blue side by side. Use the four color wheels:
- Lift: the shadows. Pull it down until the darkest parts of the picture sit just above the bottom of the waveform.
- Gamma: the midtones, where faces usually sit.
- Gain: the highlights. Keep the brightest important detail below the top of the waveform, or it turns to pure white.
- Offset: moves everything at once.
If something white or gray in the shot looks blue or orange, nudge the wheels until the red, green, and blue columns of the parade line up on it. That fixes the white balance.
Grading comes next: the creative look. Add a new node (Alt+S, or Option+S on a Mac) so the look sits on top of the correction. Warm highlights and cool shadows, lowered saturation, deeper contrast: small moves go a long way. Grade the whole scene with the same idea, and compare shots side by side using stills (right-click the viewer and choose Grab Still).
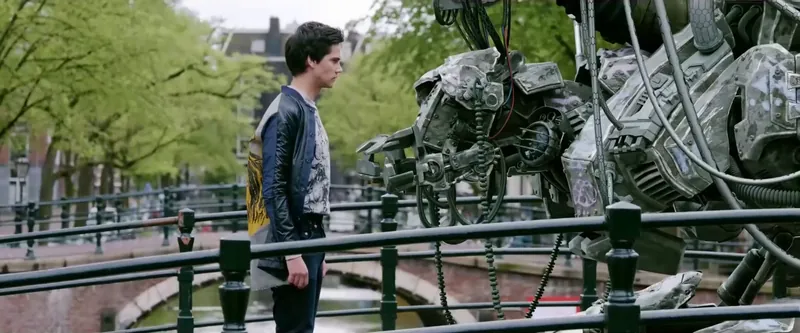
Practice footage: the Blender Foundation published the source footage of Tears of Steel, its live-action short, so filmmakers could practice with it. Grading someone else’s professional footage is a quick way to learn the Color page before you touch your own.
Sound on the Fairlight page
Audiences forgive rough pictures much more readily than bad sound. On the Fairlight page:
- Put each kind of sound on its own track: dialogue, sound effects, music. It makes balancing them much easier.
- Even out the dialogue first. Lines should sit at a consistent level; music and effects are mixed around them.
- Lay room tone under every cut in a scene, so the background hiss doesn’t jump. Our guide to recording dialogue explains how to record it.
- Watch the loudness meter. Loudness is measured in LUFS. U.S. broadcast television targets −24 (the ATSC A/85 standard), European broadcasters −23 (EBU R 128), and many streaming and web platforms turn audio up or down toward roughly −14. Fairlight’s loudness meter lets you set a target and read your mix against it.
Exporting on the Deliver page
On the Deliver page, choose a preset at the top left, pick where to save the file, click Add to Render Queue, then Render All.
- For the web: an H.264 or H.265 MP4 at your timeline’s resolution and frame rate. Resolve’s YouTube and Vimeo presets are a good starting point for any upload.
- For a master file: a high-quality format such as Apple ProRes 422 HQ or DNxHR HQ. These files are large, but they keep almost all the picture quality. Keep one as your archive, and send a master when a festival or a platform asks for your film. (When you submit to IFN, a screener link is enough at first.)
Common beginner problems
- Playback stutters: right-click your clips and choose Generate Proxy Media (or Generate Optimized Media). Resolve edits with small, light copies and uses the originals when you export. Setting Playback › Render Cache to Smart also helps.
- Red “Media Offline” clips: the files moved. Right-click them in the media pool and choose Relink Selected Clips.
- Phone footage drifts out of sync: phones often record at a variable frame rate. Set your camera app to a fixed frame rate if it allows it, or convert the clips to a constant frame rate before editing.
- Colors look different after upload: make sure your project’s color space is the standard Rec. 709 for web delivery, and judge colors on a screen you trust.
Where to go next
Blackmagic publishes free official training books and project files for Resolve on its training page, which walk through each page in depth. Then the best teacher is a finished film: cut a two-minute scene, grade it, mix it, and export it, start to finish. If you make your films in 3D, Resolve pairs well with Blender for the edit and grade; our guide to making your first film in Blender covers that side.
Sources
- Blackmagic Design, DaVinci Resolve 21 product page (features, free and Studio editions, pages). blackmagicdesign.com/products/davinciresolve
- Blackmagic Design, DaVinci Resolve support and release notes (system requirements by version). blackmagicdesign.com/support/family/davinci-resolve-and-fusion
- Blackmagic Design, DaVinci Resolve training (free official books and project files). blackmagicdesign.com/products/davinciresolve/training
- Wikipedia, “DaVinci Resolve” (history and version timeline). en.wikipedia.org/wiki/DaVinci_Resolve
- Advanced Television Systems Committee, A/85: Techniques for Establishing and Maintaining Audio Loudness for Digital Television. atsc.org/atsc-documents/a85-techniques-for-establishing-and-m...
- European Broadcasting Union, EBU R 128: Loudness normalisation and permitted maximum level of audio signals. tech.ebu.ch/publications/r128
- Blender Foundation, Tears of Steel project site (film and source footage). mango.blender.org
Online sources checked November 14, 2026.